

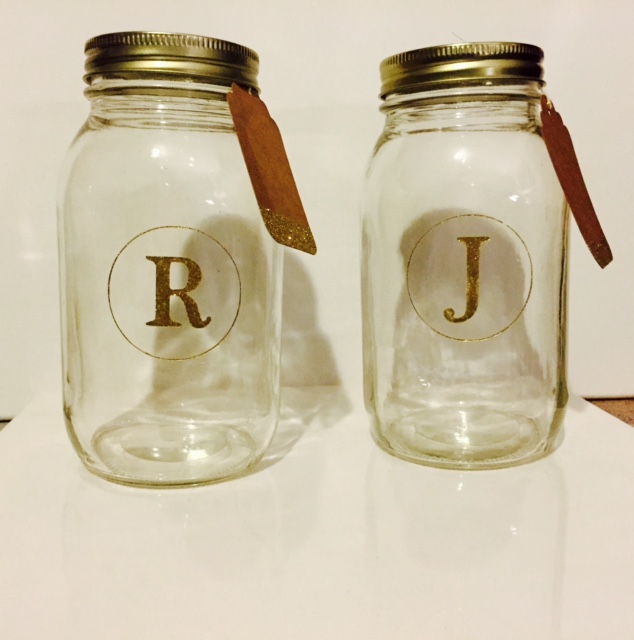
I have a confession to make. I love mason jars. They’re cheap, durable, and have a vintage charm that I am obsessed with.
They were also on sale at A.C. Moore this week making them the perfect DIY project to attempt to create for my bridesmaids.
Here’s how you can make these beautiful monogramed mason jars:
What you will need:
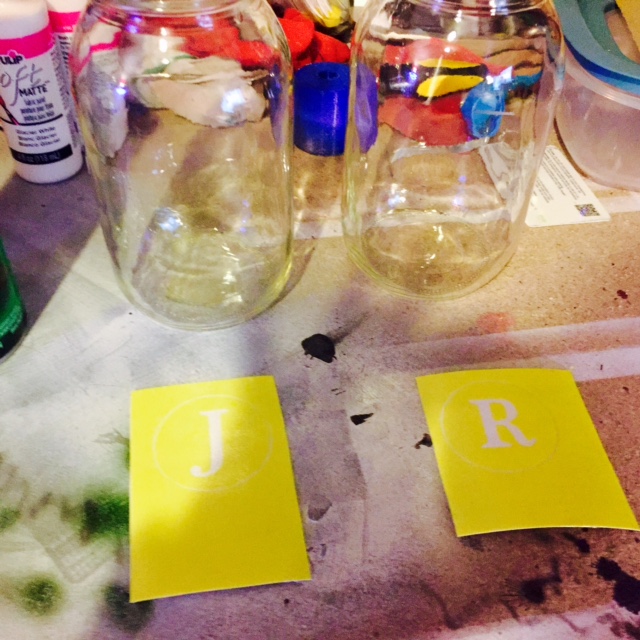
- Mason Jars
- Spray Paint Primer (I used Rust-Oleum Flat White Primer)
- Gold Spray Paint (I used Chase 24 Kt. Gold Metallic Spray)
- Gold Glitter Spray Paint (I used Rust-Oleum Glitter Spray Paint)
- Painters Tape
- Stencil (I used vinyl stencils custom made from WayneReplicas via Etsy)
- Glitter Tags (optional)
Directions:
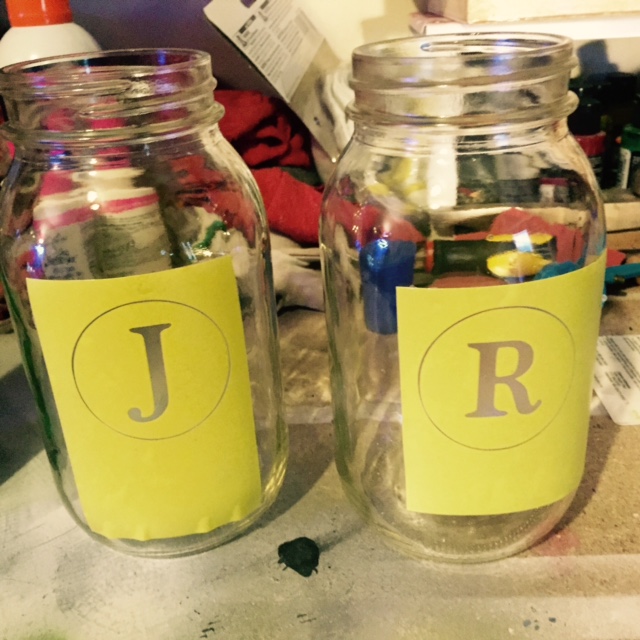
- Remove the tops from the mason jars. Make sure to take off any barcodes attached to the jars. (Mine were on the bottom. Some warm water and gentle scrubbing took them right off)
- Take your stencils and apply them to your jars, making sure the letters are centered. The stencils I used were custom made by my fiancé thanks to his vinyl printer. However, he also sells them on his Etsy site linked above, or you could experiment with paper stencils. If you do use paper stencils make sure that your paper is thick enough so that the paint won’t bleed through the layer.
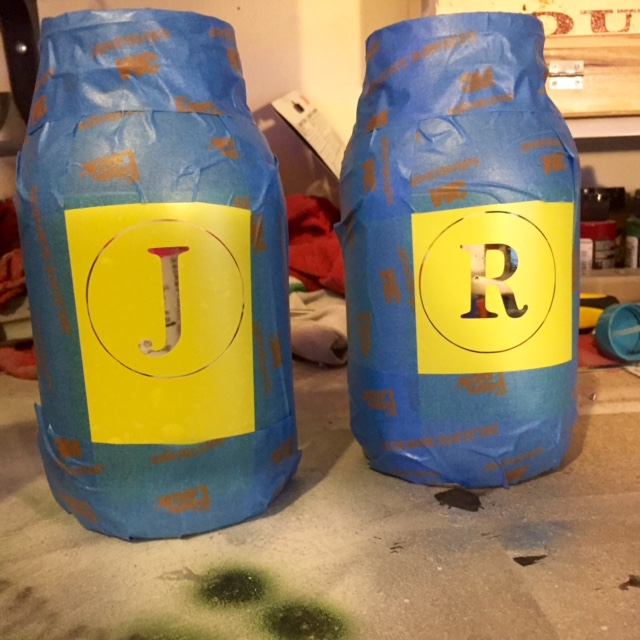
- Use painter’s tape to protect the glass area surrounding your letters.
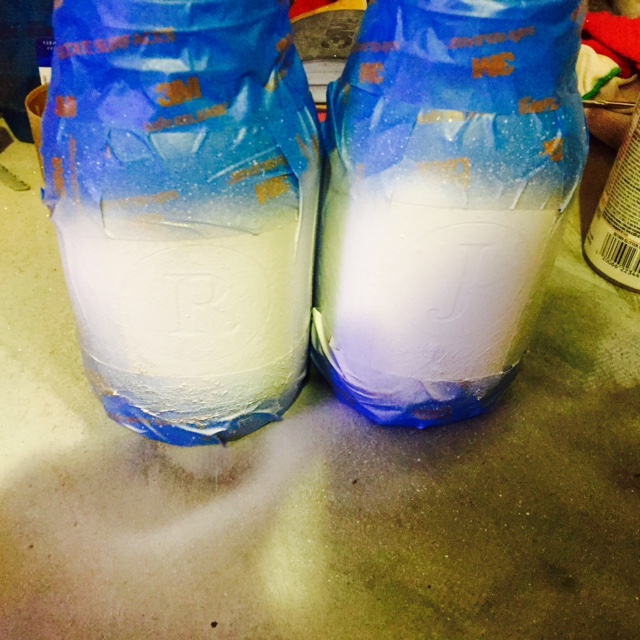
- Spray a thin coat of primer and let dry. I let mine sit for about 10 minutes.
- Spray a coat of the gold paint and let dry. (At this point in the process the gold paint started to bubble and crack, but I thought it gave the letters a more rustic look)
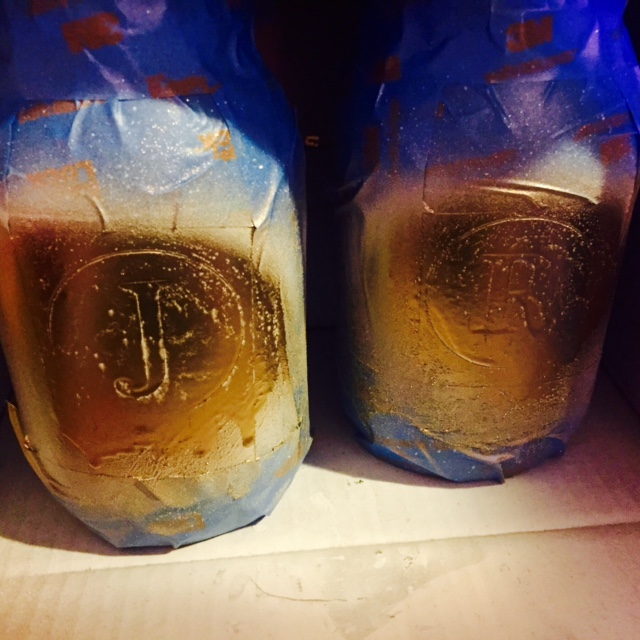
- Spray a coat of the glitter spray paint and let dry. I let this layer dry longer than the others (around two hours) just to make sure all the layers were completely set.

- Slowly peel off your stencils. I attached paper tags with gold glitter that I bought at A.C. Moore, but you could also use ribbon or string.
That’s it! Overall I would say that this craft was pretty easy. I am not crafty at all and was able to handle it. Make sure you set aside plenty of time for this craft (maybe a lazy Sunday afternoon for example) because of the drying time needed for each layer. Also, make sure your use your spray paint in a well- ventilated area. I just opened up all the windows in the room that I was in and turned on a fan since I live in New England and it’s freezing out right now.
Or if you don’t have the patience for this craft just buy something already made from your local craft store. Nobody will know you didn’t make it yourself! Unless you tell them…
A.C. Moore had a really cute collection of mason jars with chalk paint already on the front so you could customize them without having to deal with smelly spray paint.
Have you tried any mason jar or wedding crafts? Were they successful or total failures? Let me know in the comments below!

Defo have to try this
LikeLiked by 1 person
I love mason jars too!!! 😍😍😍 super useful for organizing and keeping tiny items :))
LikeLiked by 1 person